List Sorcerer™ includes a handy campaign wizard to help you effortlessly setup campaigns. This wizard is automatically launched the first time that you start the List Sorcerer program. The campaign wizard can also be manually launched anytime by selecting the "Campaign Wizard" option from the "Configuration Wizards" menu located within the top menu bar or the program.
The instructions below are in respect to using the campaign creation wizard to create a campaign that uses an external database, you would create a campaign of this type when you needed to integrate live data into your campaign in which the live data resides within a database that is external to list sorcerer's internal database. An example of this might be a customer database that is being used by another program yet you would also like list sorcerer campaigns to derive its data from this same database. In this case you would want to create an campaign that used an external database.
If your new campaign is NOT reliant upon using Live information from an external database then we highly recommend that you refer to the instructions related to Setting up a Campaign that uses List Sorcerer's Internal Database
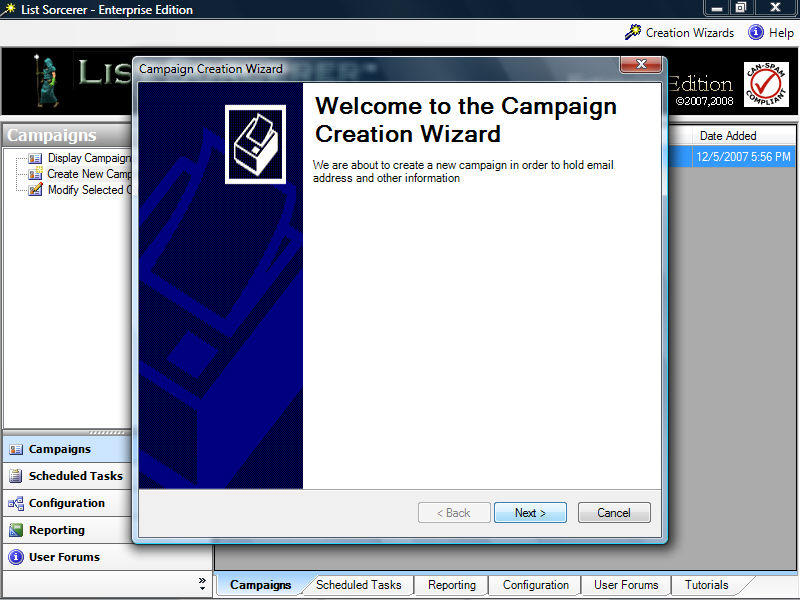
Campaign Wizard Step 1/11
The initial screen within the campaign wizard as shown below simply acts as an introduction to the wizard. If you require a more detailed explanation of what a campaign comprises refer to the section within this manual titled What is a Campaign?.
The campaign wizard will guide you through setting up a complete campaign with just a few simple steps. It will also create a serious of default templates which you would modify as you wish prior to putting them into an active state within the campaign.
Click the "Next Button located within the lower right hand corner of the wizard to continue
Configuration
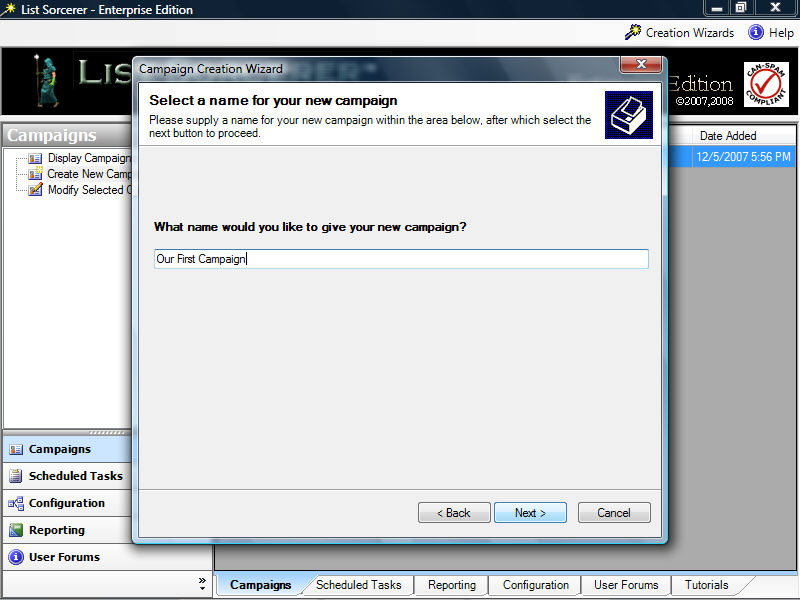
Wizard Step 2/11
Enter in a name for this new campaign. Campaign
names are used internally and end users of your campaign will never see
this name, so it best to use something that you find descriptive.
Click the "Next Button located within the lower right hand corner of the wizard to continue
Configuration
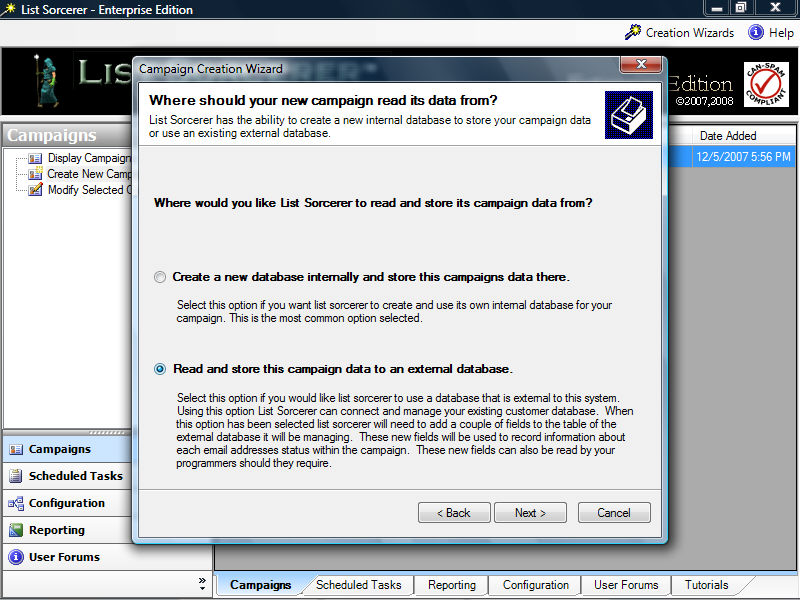
Wizard Step 3/11
Within this next step it is imperative that you select the second option
which is called: "read and store
this campaigns data to an external database." Selecting
this option is what dictates how campaign data is to be read and archived
within the campaign you are creating.
Click the "Next Button located within the lower right hand corner of the wizard to continue
Configuration
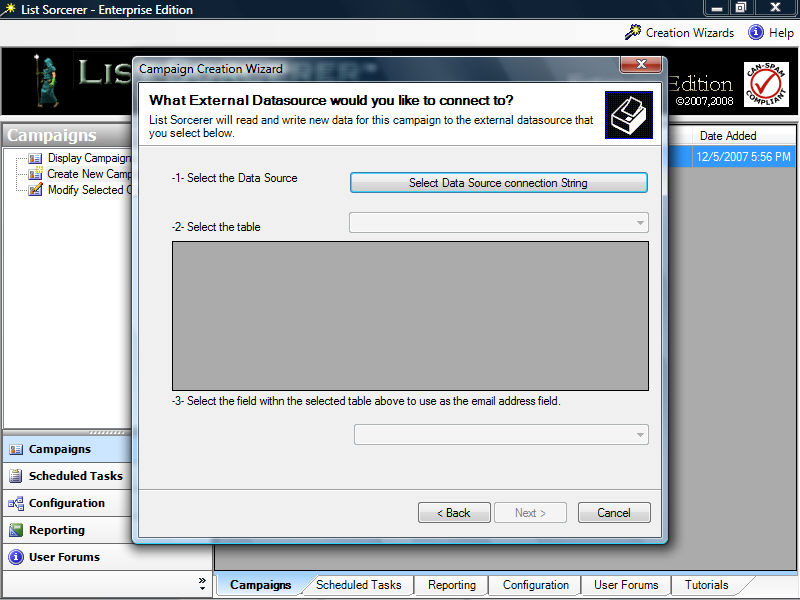
Wizard Step 4/11
We need to tell the campaign creation wizard about our external database,
by first specifying a data source connection string, we do this by selecting
the "Select Data Source Connection
String" button
.
Configuration
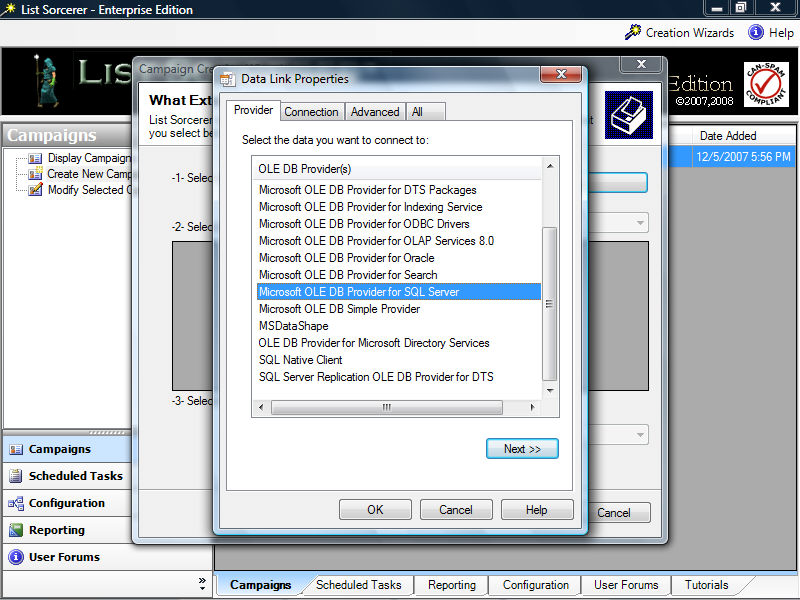
Wizard Step 5/11
Upon selecting the "Select Data Source
Connection String" button. we will shown the "Data
Link Properties" box. Select "Microsoft OLD DB Provider for SQL Server"
from the as the OLE DB Provider(s)
box.
Click
the "Next Button located within the lower right hand corner of the
wizard to continue
Configuration
Wizard Step 6/11
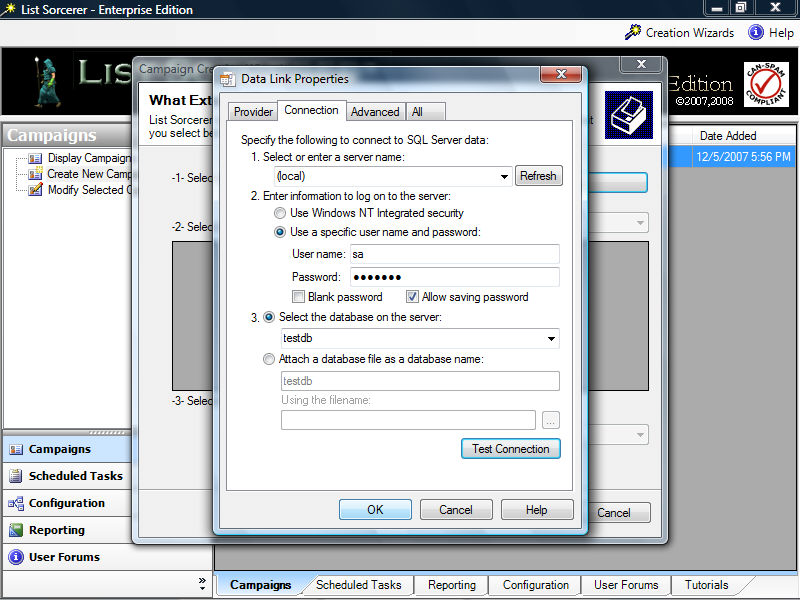
Now select the server name, in this case our sql server name is
local to our list sorcerer program so we will just enter in the server
name: (local). We
now enter in the user name and password that we use when connecting to
the server, we are using the sa user name in this example however it is
highly recommended that you use server the credentials of another user
for security reasons. Remember to select the "Allow saving password" option otherwise
the list sorcerer will not be able to log into the database to retrieve
your data when needed. Lastly select the database
on the server that you would lik your campaign to connect with, in this
example out database name is called "testdb". Now
select the "Test Connection"
button and providing that your connection tests successfully proceed with
now selecting the "OK"
button
Configuration
Wizard Step 7/11
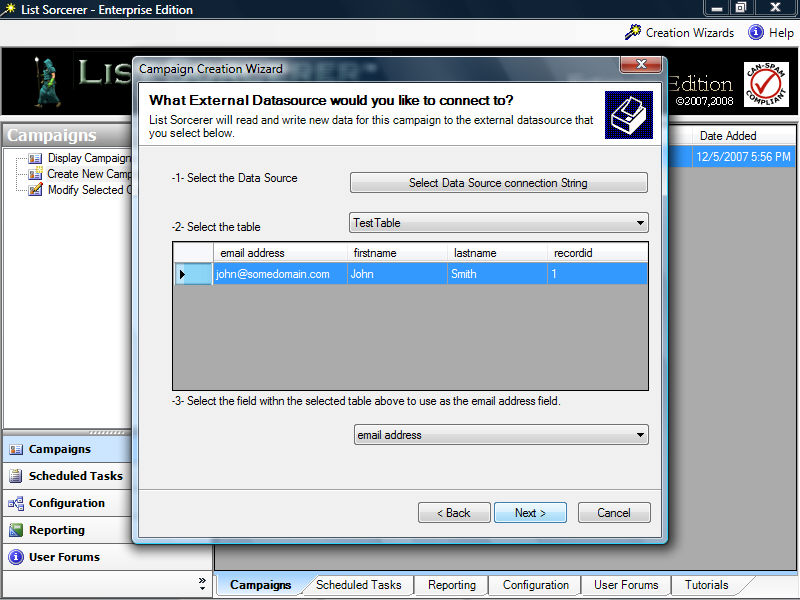
Upon the successful connection to your external database the campaign creation
wizard will present with table containing database information. Using
this database information you now need tell the wizard which database
table to use and what field within this table to treat as the email address
field. Looking at the table below you will see
that in our example we have chosen the table called "TestTable"
and have also instructed the wizard to use the vale within 'email address'
field as the email address when sending.
Click the "Next Button located within the lower right hand corner of the wizard to continue
Configuration
Wizard Step 8/11
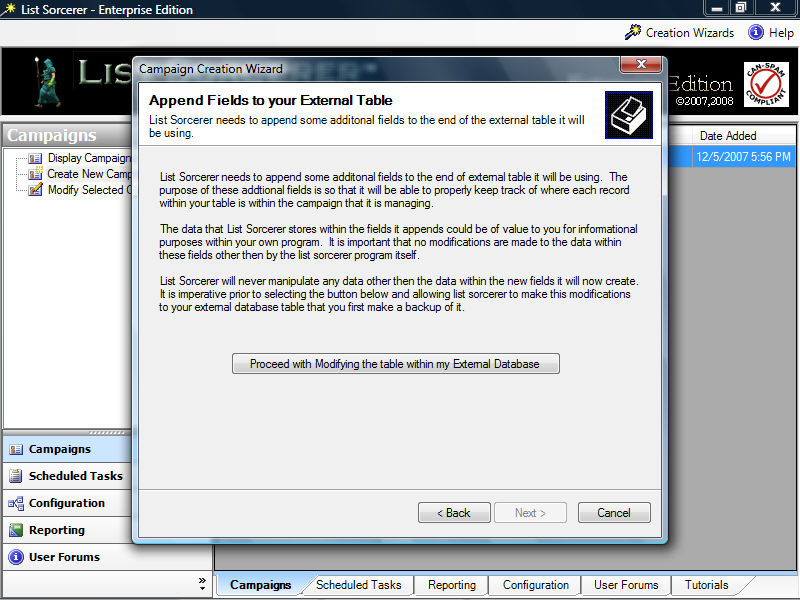
List Sorcerer needs to write informative campaign tracking data back to
the external database your using. List Sorcerer
will never write data to database fields that already exist, instead it
will create some additional fields and then use those fields for this
purpose. The data that it places within these fields
is quite informative and is available for your use should you require.
Below is a summary of the data fields that the campaign wizard will append to your original database table.
|
Field Name |
Field Type |
Purpose |
|
LSE_DateAdded |
datetime |
Date the record was added |
|
LSE_DateLastSent |
datetime |
Date the record last received an email |
|
LSE_DateSubscribed |
datetime |
Date the record subscribed |
|
LSE_DateVerified |
datetime |
Date the record subscription was verified if Double opt-in |
|
LSE_DateUnSubscribed |
datetime |
Date the record unsunscribed or requested to be removed |
|
LSE_DateFailed |
datetime |
Date the last mail attempt failed |
|
LSE_RecType |
varchar(1) |
Current state of record, 'A' = active, 'K' = usubscribed, 'U' = undeliverable etc. |
|
LSE_Mailed |
varchar(1) |
Has the record been mailed |
|
LSE_LastMailResult |
varchar(1) |
Result of last mail attempt |
|
LSE_FailedMailCount |
int |
How often a failed last attempt has failed |
|
LSE_emailguid |
uniqueidentifier |
unique identifier for record, often uses as part of the unsubscribe |
|
LSE_EmailTracking |
xml |
xml formatted field of everything the record as gone through, which email received etc.. |
|
LSE_OriginalSubscriptionEmail |
varchar(MAX) |
Copy of original subscription email that prompted the sunscription or verification email |
|
LSE_HasBeenVerified |
bit |
Used if double opt-in processing has been enabled |
|
LSE_VerificationSent |
bit |
double opt-in verification email sent and awaiting reply |
Click the "Next Button located within the lower right hand corner of the wizard to continue
Configuration
Wizard Step 9/11
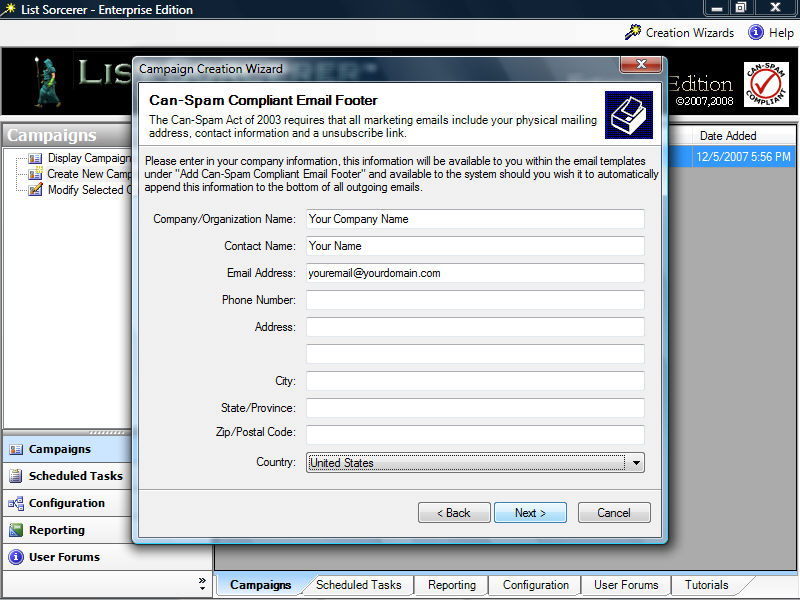
The "Can-Spam Compliant Email Footer" acts as a place holder
for your company information. Although the program
does not enforce the entry of this information it is highly recommended
in order to remain can-spam compliant. Once this
information has been entered you will be able to modify it from within
the campaigns configuration, make use of it in the body of your email
using our convenient email template link, or have the system automatically
handle the placed by turning the campaign feature on.
Click the "Next Button located within the lower right hand corner of the wizard to continue
Configuration
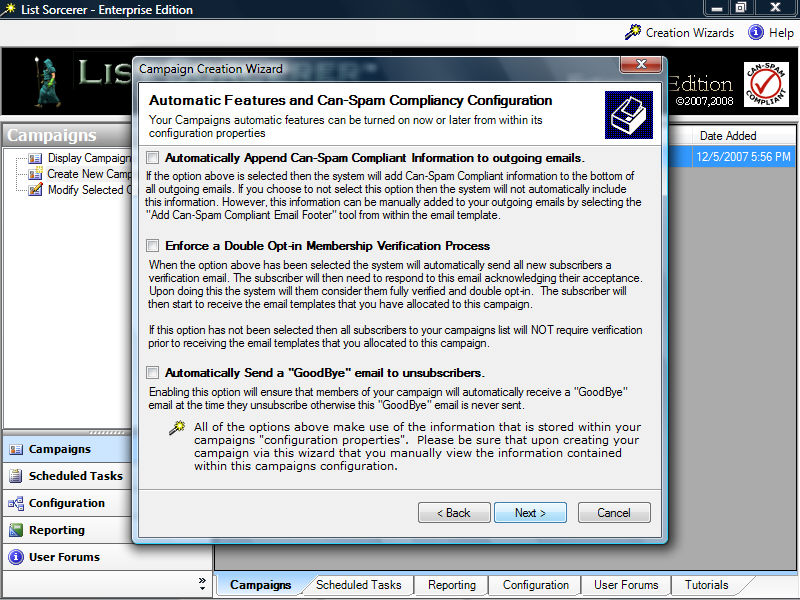
Wizard Step 10/11
Each campaign within List Sorcerer™
has its own set of configurable features that not only help
you remain can-spam compliant but will also enable you to push your campaign
into high gear with ease. The configuration of
these feature can be later modified from within your newly created campaigns
configuration tab. The wizard already supplies
you with detailed information on what each of these features are and what
they do. A more precise description of how these
features will interact with your campaign is available within the Campaigns
Section of this manual.
Click the "Next Button located within the lower right hand corner of the wizard to continue
Configuration
Wizard Step 11/11
Congratulations you have completed setting up your campaign. Upon
selecting the OK button the wizard will create your new campaign according
to the specifications that you have supplied. The
campaign creation wizard will also create some default templates in order
to help you get your campaign in motion as quickly as possible.
If your not sure what you should modify within your newly created campaign in order to make it live please follow the instructions within the next topic titled: Bringing your campaign online
