List Sorcerer™ includes a handy campaign wizard to help you effortlessly setup campaigns. This wizard is automatically launched the first time that you start the List Sorcerer program. The campaign wizard can also be manually launched anytime by selecting the "Campaign Wizard" option from the "Configuration Wizards" menu located within the top menu bar or the program.
The instructions below are in respect to using the campaign creation wizard to create a campaign that uses list sorcerer's internal database to store and manage member email addresses and other member information. This is most common campaign configuration and is the one recommended to use unless you need to integrate live data into your campaign in which you would want to follow the campaign creation wizard instructions for creating a external database campaign
Campaign Wizard Step 1/7
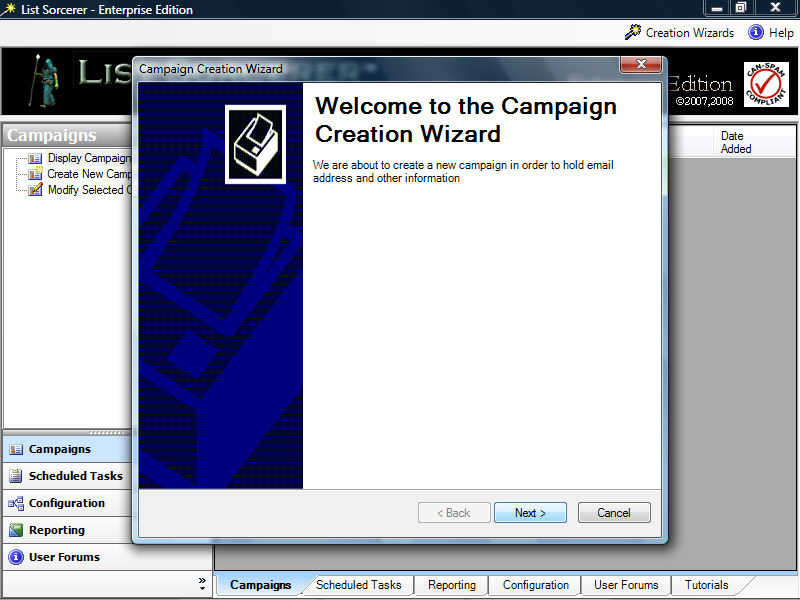
The initial screen within the campaign wizard as shown below simply acts as an introduction to the wizard. If you require a more detailed explanation of what a campaign comprises refer to the section within this manual titled What is a Campaign?.
The campaign wizard will guide you through setting up a complete campaign with just a few simple steps. It will also create a serious of default templates which you would modify as you wish prior to putting them into an active state within the campaign.
Click the "Next Button located within the lower right hand corner of the wizard to continue
Configuration
Wizard Step 2/7
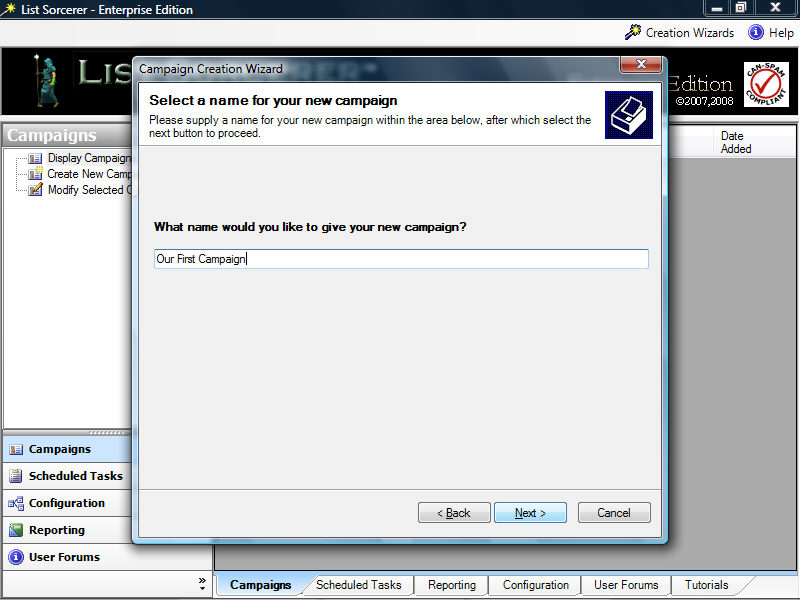
Enter in a name for this new campaign. Campaign
names are used internally and end users of your campaign will never see
this name, so it best to use something that you find descriptive.
Click the "Next Button located within the lower right hand corner of the wizard to continue
Configuration
Wizard Step 3/7
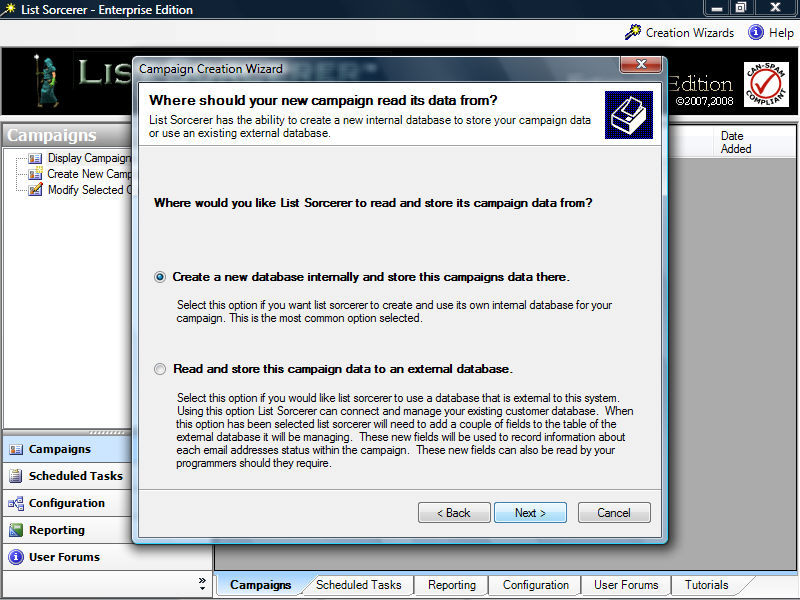
Within this next step it is imperative that you select the first option
which is called: "Create a new database
internally and store this campaigns data there." Selecting
this option is what dictates how campaign data is to be read and archived
within the campaign you are creating.
Click the "Next Button located within the lower right hand corner of the wizard to continue
Configuration
Wizard Step 4/7
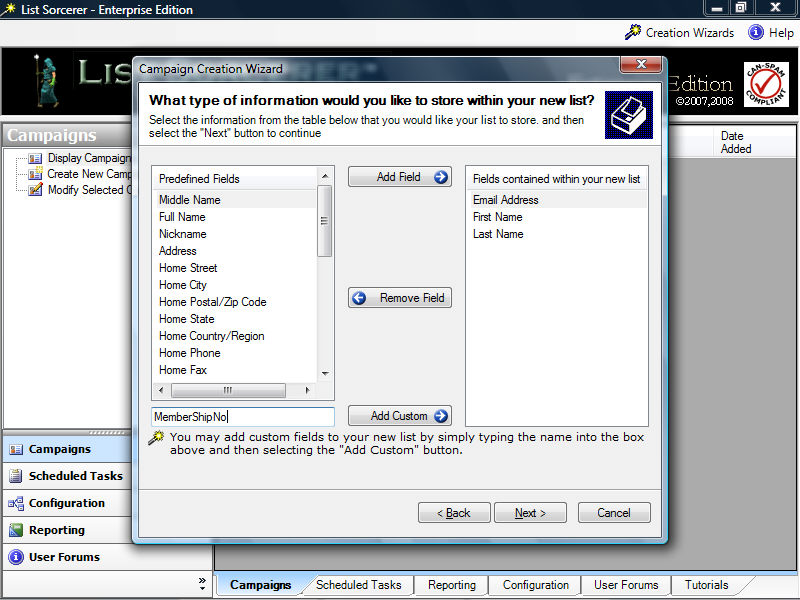
Use the screen below to tell the campaign wizard what type of information
you would like your new campaign to contain. You
will notice that the wizard has supplied you with many common predefined
fields for you to select from, in addition using the custom field box
beneath the predefined fields you may enter in any additional fields you
wish.
Click the "Next Button located within the lower right hand corner of the wizard to continue
Configuration
Wizard Step 5/7
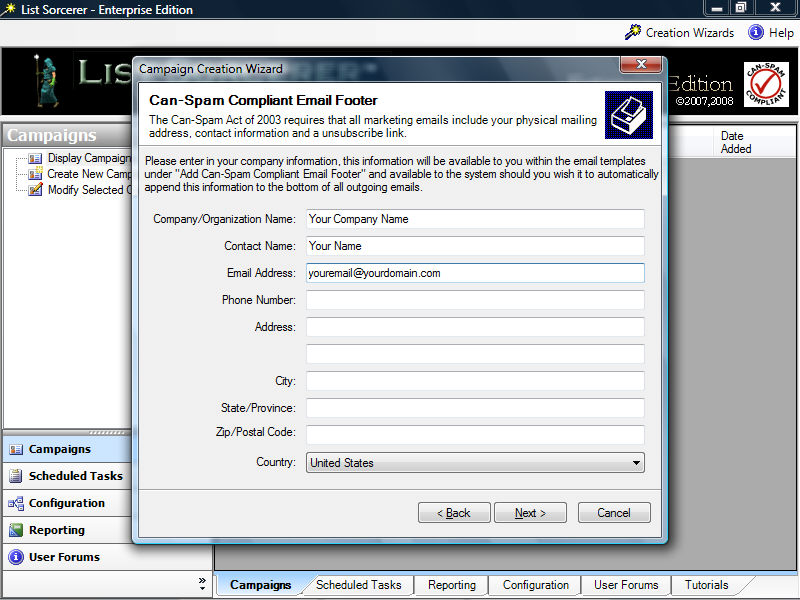
The "Can-Spam Compliant Email Footer" acts as a place holder
for your company information. Although the program
does not enforce the entry of this information it is highly recommended
in order to remain can-spam compliant. Once this
information has been entered you will be able to modify it from within
the campaigns configuration, make use of it in the body of your email
using our convenient email template link, or have the system automatically
handle the placed by turning the campaign feature on.
Click the "Next Button located within the lower right hand corner of the wizard to continue
Configuration
Wizard Step 6/7
Each campaign within List Sorcerer™
has its own set of configurable features that not only help
you remain can-spam compliant but will also enable you to push your campaign
into high gear with ease. The configuration of
these feature can be later modified from within your newly created campaigns
configuration tab. The wizard already supplies
you with detailed information on what each of these features are and what
they do. A more precise description of how these
features will interact with your campaign is available within the Campaigns
Section of this manual.
Click the "Next Button located within the lower right hand corner of the wizard to continue

Configuration
Wizard Step 7/7
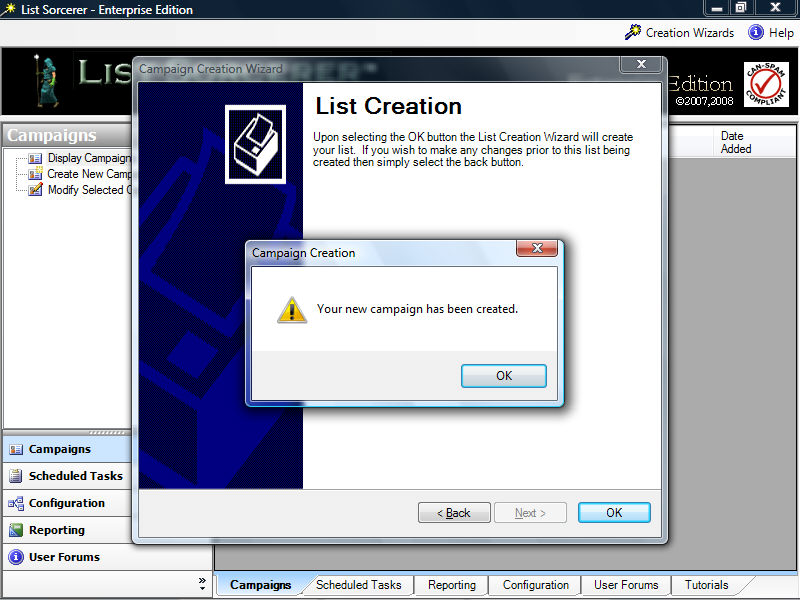
Congratulations you have completed setting up your campaign. Upon
selecting the OK button the wizard will create your new campaign according
to the specifications that you have supplied. The
campaign creation wizard will also create some default templates in order
to help you get your campaign in motion as quickly as possible.
If your not sure what you should modify within your newly created campaign in order to make it live please follow the instructions within the next topic titled: Bringing your campaign online